Using the Android development kit is highly essential if you want to develop an Android app. Android OS is built upon the Linux kernel and runs on most of the smartphones and tabs.
The latest version is Android 7 Nougat, which will gradually become available for more and more devices over the coming months.
Marshmallow is 6.x, Lollipop is 5.x, and KitKat is version 4.4.x, with 4.3, 4.2 and 4.1 all coming under the codename name Jelly Bean.
Android platform is based on Linux with a set of core C/C+ + libraries. Android apps are written in Java and run on Android’s own Java virtual machine known as Dalvik Virtual Machine.
This DVM is optimized to work on mobile phones. Before you begin the development of the app, there are software, tools and development packages that must be properly installed.
Your computer requirements must be fully met in order to get the kit install. Knowing about android app development kit can be really helpful following the android app development steps for beginners.
Installing The Android Development Kit
Installing required software for Android takes almost 30 to 60 minutes depending upon network downloading speed. There must be 5 to 10 GB free disk space in the computer to make sure it gets enough space.
Its time to install Android Studio which is IDE based on popular Java IDE and SDK libraries.
Java Development Kit:
- First of all, install JDK or Java Development Kit
- It should be above 1.7 or at least 1.7. It will take a lot of time to install completely. When it is done, you are ready to go ahead.
- First, see system requirements for Android Studio. Now download Android Studio for Windows.
- Run download installer and follow instructions appearing on the screen. Accept the defaults. Installation is complete. There should be 5 GB or more disk space.
- Android Studio is installed in C drive.
SDK Packages
- Add a few basic SDK packages to run the apps. Adding lots of SDK packages is quite time-consuming. Images also take huge disk space which is above 10 GB per API level.
- But you can also go for a small set of SDK packages. You can also copy SDK instead of downloading it during the installation process.
For Windows, follow these steps :
- Launch Android Studio and check ‘I do not have the previous version of Android Studio’.
- The setup wizard will download more SDK file components.
- Let it complete. Click Finish.
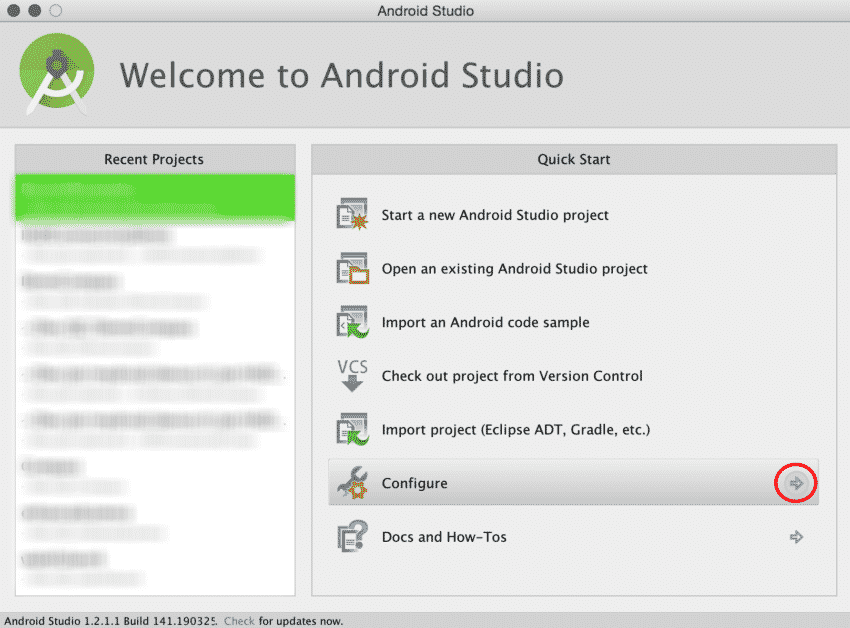
- Now select Configure, SDK manager, SDK tools. Check Android Support Library, Intel x86 Emulator Accelerator, and Google USB Driver.
- Finally > Apply.
- Launch Android Studio. It will download more SDK components.
- Let it complete then click Finish. Select Configure, SDK Manager.
- If there is an error, copy SDK location ‘Users/…LibraryAndroid/SDK’ and select Configure, Project defaults, project structure in Android SDK Location. Paste here.
- Select Configure, SDK Manager, Launch Standalone SDK Manager.
- Click Deselect All or it will take several hours to finish the installation of all packages.
- Check these packages are ‘installed’ or check them to get installed.
- In Tools screen, Android SDK tools, the Android SDK platform-tools, Android SK Build-tools (highest version).
- For Android 6.0 check SDK platform, System Image.
- And for Extras see these options: Android Studio Library, Google Repository, Intelx86 Emulator Accelerator.
- Click ‘Install n packages’.
- SDK will install under “~/Library/Android/SDK”. This procedure is for Mac OS.
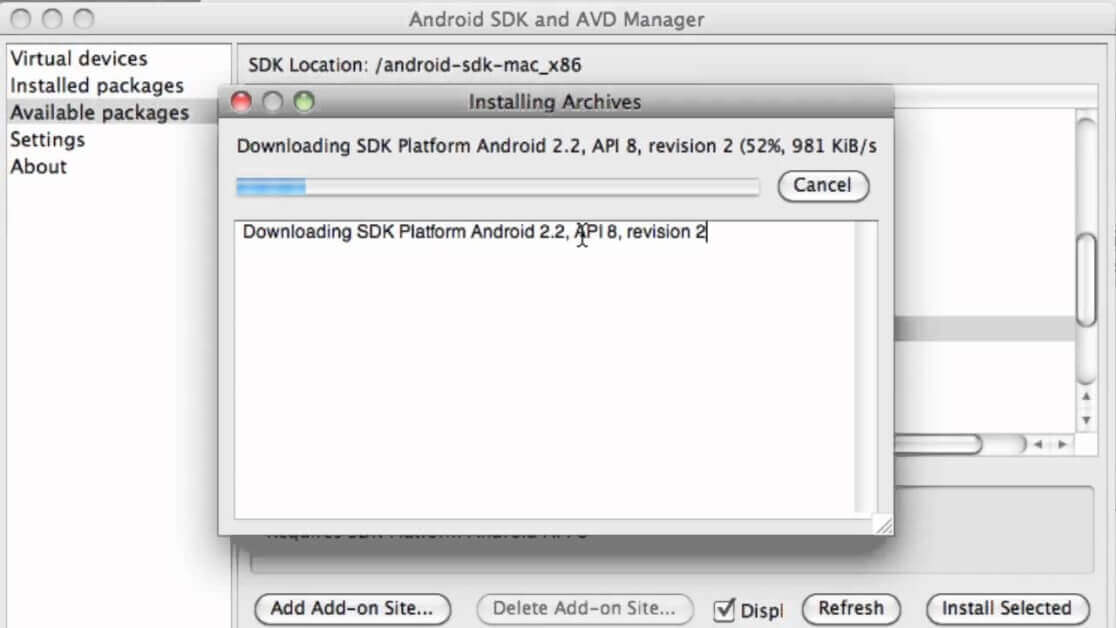
Opening SDK Manager
- To open SDK manager, drag Android executable into terminal Window. Click Enter.
- When it is open, make sure to install these packages and other relevant ones:
- The platform, Build, The Android Debugging Bridge.
- Tools work with Platform but can also be updated separately if required. These are JOBB, ProGuard, and zipalign.
- JOBB helps create encrypted and unencrypted APK expansions in OBB format. ProGuard removes unnecessary items from the app and renames classes.
- SDK tools are used regardless of the Android version supported. These are build-tools, image tools, debugging-tools, and some others. Android Debugging Bridge (ADB) and fast boost are also important if the device is stuck somewhere.
- Facebook issued to wipe partitions if something occurs. The procedure is simple in adroid development kit.
- ADB can be used for troubleshooting purposes with devices and apps.
- Because Android is a Linux-based OS, the only way to obtain is the command-line.
- Manipulate root access is required to perform advanced operations on the device with the help of root access.
- These things are possible on the device using a terminal emulator.
- It is tough to execute complex commands like smaller screens.
- ADB works like the bridge between your computer and phone.
- When all of these are completely installed, you are ready to begin developing the app.
Basic Steps To Start Building App Using Android App Development Kit
Step 1 : Start with Android Studio
he most common IDE for developing Android is Android Studio, that comes directly from Google itself.
The amazing thing is that Android Studio is designed specifically for application development services for Android.
Step 2 : Installing the Java Development Kit (JDK)
After the installation of Android Studio, it’s time for more positive action! You also need to install Java on your machine to use Android Studio.
The JDK is able to interpret and compile the code for application development.
Step 3 : Start your project
Choose ‘Start a new Android Project study’ option. Enter the name you want for your application and its ‘business domain’.
All these elements will be used to create the package name in a format like:
This APK ( ‘Android package file’) is charged at the end to the Google Play store.
Step 4 : Select Activity
On the other hand, there is an option where you will have to choose how you want the application to look at the beginning. This is the aspect of the ‘Activity Module’ principle, which is basically the main page of your application.
There are several fields available you have to choose according to your application needs, such as templates, title, access to Google maps, full-screen activity, target activity, etc.
It is better to go to ‘Basic Activity’ to keep as simple as possible and for all purposes things.
Step 5 : Select Design
Now, you have to choose a name for the presentation of the selected activity. This will define where items such as pictures and menus are and what fonts it will use.
Choose a name for the menu and title as well. Choose something attractive for the title, since users will be able to see this in some points.
Step 6 : Edit the welcome message
Go to the activity_main.xml tab if it is not open. Click and drag the “Hello world!” at the top left of the phone screen to the center of the screen.
Then go to the folder and values, double-click the file strings.xml. In this file, locate the line “Hello world!” And add “Welcome to my application!”
Step 7 : Adding the button to your activity
In the palette menu to the left of the screen, the Search button. Click and drag the button placed below the welcome message. Then go to the properties and find the text field. Change the text of the “New button” to “next”.
Now go back to your content_main.xml and click the button. In the right corner, where it has its parameters for the button, an option called ‘on click’ is captured. Click this and then select the ‘onclick’ option. By doing this, you said you want to associate the Android Studio code section with the button created.
Step 8 : Test your test App app
Finally, all you need to do is run the application you just made.
Easy to go to ‘run’ along the top and then select ‘Run Application’ from the dropdown menu. Follow the steps to start the emulator application runs.
In addition, there are numerous ways to develop Android applications. With a wealth of information and services available, you have the opportunity to make their “dream application” realism!
The New Trend In Android App Development
The latest trend is that Eclipse is no more used where Android Developer Tools are downloaded separately.
Google has created Android Studio that has made the job easier through the one-click install of all components and tools required for developing Android apps.
If you need to install Android SDK only, that is not a big issue. It is easily configurable. Now, you can create simple apps on your own without hiring or getting services from a professional app developer.
To understand all procedures, you can also view video tutorials online or read available content. If something goes wrong to ask a friend to guide you about how to install the development kit.
The watching tutorial is better as it is more helpful and enables you to follow step by step. The procedure for Windows and Mac OS is a bit different so follow it accordingly.
Make sure there is enough disk space on the C drive and the internet speed is high. The entire kit installation will take place for one time only and you will not have to do this every time you need to use it like all other software.
So, do it carefully and with proper techniques. It is better to have one computer with high specs spare for development purposes only to keep it clutter-free remove all other software and files.
It will make working with the development kit easier and smooth. Sometimes downloading too many files causes confusion. So, keep a computer for Android development only if you want to develop apps off and on.
Wrapped Up
There is another android development kit as well but the Android Studio made by Google is mostly used now because of ease and convenience.
At Echoinnovate IT our expert team of developers can help you with your android app development. Contact Us! Today.